OpenID Connect - Dotnet Desktop Application
Recently, I’ve been deep diving into JSON Web Tokens (JWT) and the OpenID Connect protocols. My end goal was to be able to use the OpenID Connect Authorization Flow to add authentication and authorization to a native desktop application using Dotnet.
The basic authentication workflow for a native/desktop/console/ application is as follows (RFC 8252 Section 4.1):
- Application retrieves the following from the Authorization Server’s OpenID Connection Configuration Endpoint:
- Signing Keys
- Authorization Endpoint
- Token Endpoint
- Application opens the system default browser to the Authorization Endpoint URI including the following details as query string parameters:
- Response Type = “code”
- Client ID
- Redirect URI
- Scope (Must include at least
openid) - State (Secure random value)
- Code Challenge
- Code Challenge Method
- Authorization Server’s Authorization Endpoint receives the authorization request and then authenticates and authorizes the user.
- Authorization server issues an authorization code and redirects the browser to the specified Redirect URI with the response appended to it as query string parameters.
- Application receives the Redirect URI and retrieves the authentication code and validates the state from the response.
- Application sends the authentication code to the Token Endpoint including the following details:
- Grant Type = “authorization_code”
- Client ID
- Authentication Code
- Redirect URI
- Code Verifier
- Authorization server validates the authorization code and issues the ID and Access Tokens.
- Application validates the ID Token using the Signing Keys obtained previously.
There is a lot to unpack in each of these steps but we will cover everything as we implement them.
Configuring the Authentication Server
Since I am mainly focusing on the client-side of things for this round of investigation, Auth0 provided a great starting point for the server-side of things as it fully supports the OpenID Connect Authorization Code Flow. You can quickly sign up for a free account that gives you plenty of capabilities to get started.
- Sign up for an Auth0 account.
- Create a new Native Application (Mobile, desktop, CLI)
- Copy down the
DomainandClient IDlisted on the Settings tab. - Set the
Callback URLsto:http://127.0.0.1:49152/callback - Set the
Allowed Web Originsto:http://127.0.0.1:49152 - Create two roles: Admin, Guest
- Create a test user with the Admin role.
The following values are used for all example outputs below:
- Domain: dev-MyDotnetApplication.us.auth0.com
- Client ID: OiCPeU0i214x6nJUq4YG4ECUlPOSUAlt
Auth0 User Roles
Auth0 does not add the roles to the ID Token JWT by default. We will use a login action workflow to automatically add the roles as custom namespaced claims to the ID and Access tokens that are generated by Auth0:
exports.onExecutePostLogin = async (event, api) => {
  const namespace = event.client.client_id;

  if (event.authorization) {
    // Set claims
    api.idToken.setCustomClaim(`${namespace}/roles`, event.authorization.roles);
    api.accessToken.setCustomClaim(`${namespace}/roles`, event.authorization.roles);
  }
};
Note: We are using the Client ID from the authorization request as the namespace because the “roles” claim is restricted by Auth0 and cannot be set by the login actions. If you try, it will be silently ignored and the token will be untouched.
If our Client ID was “XYZ123” then a custom claim “XYZ123_roles” will be added for each role.
The Authorization:RoleClaimType configuration option must match this value.
Create the Dotnet Console Application
For simplicity we will be using a Dotnet Console Application but the same workflow and implementation can work for User Interface applications as well.
From a command line execute the following to create the console application project:
dotnet new worker -n OpenIdConnectConsoleTest
cd OpenIdConnectConsoleTest
dotnet new class -n AuthenticationSettings
dotnet new class -n AuthorizationCallbackResponse
dotnet new interface -n ICallbackListener
dotnet new class -n CallbackListenerFactory
dotnet new class -n HttpCallbackListener
dotnet add package Microsoft.IdentityModel.Protocols.OpenIdConnect
We will be using the models defined in System.IdentityModel.Tokens.Jwt since Microsoft has already provided the proper DTO classes that are needed to deserialize the requests and validate a JWT.
We could create each one on our own but the models are just simple classes with the required properties so we would just be duplicating the effort.
The same thing goes for Microsoft.IdentityModel.Protocols.OpenIdConnect which contains the DTO classes for working with the OpenID Connect protocol.
AuthenticationSettings Class
Edit AuthenticationSettings.cs with the following contents:
namespace OpenIdConnectConsoleTest;

public class AuthenticationSettings
{
    public string Audience { get; set; } = string.Empty;
    public string Authority { get; set; } = string.Empty;
    public string ClientId { get; set; } = string.Empty;
    public string ClientSecret { get; set; } = string.Empty;
    public int RedirectUriPort { get; set; } = 0;
    public string RoleClaimType { get; set; } = "roles";
}
We will use the dotnet user-secrets command to setup the configuration for items we need.
Execute the following from a command line from the project folder with the placeholders replace with your Auth0 values from earlier:
dotnet user-secrets clear
dotnet user-secrets set "Authentication:Authority" "https://{Auth0 Domain}/"
dotnet user-secrets set "Authentication:ClientId" "{Auth0 Client ID}"
dotnet user-secrets set "Authentication:RedirectUriPort" "49152"
dotnet user-secrets set "Authentication:RoleClaimType" "{Auth0 Client ID}/roles"
Edit appsettings.Development.json and change the Logging:LogLevel:Default value to Debug.
There is lot of debug logging in the example code below so you can view responses.
In a real world application you should not log any sensitive information such as tokens.
AuthorizationCallbackResponse Class
Edit AuthorizationCallbackResponse.cs with the following contents:
namespace OpenIdConnectConsoleTest;

public class AuthorizationCallbackResponse
{
    public string AuthorizationCode { get; init; } = string.Empty;
    public string RedirectUrl { get; init; } = string.Empty;
    public string State { get; init; } = string.Empty;
}
This class will be used to return all of the data required to validate an authorization callback.
Worker.cs Class
Edit Worker.cs and add the following using clauses:
using Microsoft.IdentityModel.Protocols;
using Microsoft.IdentityModel.Protocols.OpenIdConnect;
using Microsoft.IdentityModel.Tokens;
using System.Diagnostics;
using System.IdentityModel.Tokens.Jwt;
using System.Runtime.InteropServices;
using System.Security.Claims;
using System.Security.Cryptography;
using System.Text;
using System.Text.Encodings.Web;
using System.Web;
Add the following lines above the ILogger private property:
    private readonly AuthenticationSettings _authSettings;
    private readonly IHostApplicationLifetime _hostApplicationLifetime;
    private readonly static HttpClient _httpClient = new();
Update the constructor:
    public Worker(
        ILogger<Worker> logger,
        IHostApplicationLifetime hostApplicationLifetime,
        IConfiguration configuration)
    {
        _logger = logger;
        _hostApplicationLifetime = hostApplicationLifetime;
        _authSettings = configuration.GetSection("Authentication").Get<AuthenticationSettings>() ?? new AuthenticationSettings();
    }
_authSettings will contain all of the configuration options that we need from the Authentication section.
This will come from the values that we stored in user-secrets previously. _hostApplicationLifetime will be used to terminate the console application when required.
ExecuteAsync Method
The Worker class is instantiated on startup as a Hosted BackgroundService. The lifetime of our console application will be based on the WorkerService. Once the ExecuteAsync method finishes executing, the console application will end.
Edit Worker.cs and change ExecuteAsync to the following:
    protected override async Task ExecuteAsync(CancellationToken stoppingToken)
    {
        try
        {
            ClaimsPrincipal user = await AuthenticateExternalUserAsync(stoppingToken);
            var userId = user.Claims?.FirstOrDefault(c => c.Type == "sub")?.Value;
            var email = user.Claims?.FirstOrDefault(c => c.Type == "email")?.Value;

            _logger.LogInformation("Authenticated as Id: {userId} Name: {name} Email: {email} Claims: {claims}",
                userId,
                user.Identity?.Name,
                email,
                user.Claims);

            _logger.LogInformation("Is in role Admin: {response}", user.IsInRole("Admin"));
            _logger.LogInformation("Is in role Guest: {response}", user.IsInRole("Guest"));

            // Perform other actions here

            _hostApplicationLifetime.StopApplication();
        }
        catch (Exception ex)
        {
            _logger.LogError("Error: {message}", ex.Message);
            Environment.Exit(1);
        }
    }
This will represent the main functionality of the console application.
We first authenticate an external user in AuthenticateExternalUserAsync and if authentication was successful we display some user information including User ID, Email, and check to see what roles the user may be a part of.
Finally, _hostApplicationLifetime.StopApplication() is called to indicate that the application should exit.
If any exceptions are raised then the application is terminated with a non-zero exit code.
AuthenticateExternalUserAsync Function
    private async Task<ClaimsPrincipal> AuthenticateExternalUserAsync(CancellationToken stoppingToken)
    {
        _logger.LogInformation("Authenticating with {authority}...", _authSettings.Authority);
        OpenIdConnectConfiguration openIdConfiguration = await RetrieveOpenIdConnectConfigurationAsync(stoppingToken);
        string codeVerifier = Base64UrlEncoder.Encode(RandomNumberGenerator.GetBytes(32));
        AuthorizationCallbackResponse response = await RequestAuthorizationCodeAsync(codeVerifier, openIdConfiguration, stoppingToken);
        OpenIdConnectMessage tokenResponse = await RequestTokenAsync(response.RedirectUrl, response.AuthorizationCode, codeVerifier, openIdConfiguration, stoppingToken);
        ClaimsPrincipal claimsPrincipal = ValidateToken(tokenResponse.IdToken, _authSettings.ClientId, openIdConfiguration);
        return claimsPrincipal;
    }
The AuthenticateExternalUserAsync function follows the OpenID Connect authentication workflow. The steps of the workflow are broken down into individual methods.
First, we retrieve the OpenID Connect configuration information in RetrieveOpenIdConnectConfigurationAsync.
We generate a random codeVerifier value that will be used to protect our authorization request from interception which we will discuss in more detail in RequestAuthorizationCodeAsync and RequestTokenAsync. For now we just need to know that it is a secure random 32 byte value encoded in URL safe Base64 encoding.
We request the authorization code in RequestAuthorizationCodeAsync and then immediately use it to request ID and Access Tokens in RequestTokenAsync.
Finally, we call ValidateToken to validate the ID Token and turn it into a Dotnet Identity ClaimsPrincipal that is returned representing the authenticated user.
RetrieveOpenIdConnectConfigurationAsync Function
OpenID Connect uses multiple endpoints that are called to perform the various steps of the protocol. These usually are easy to guess based on the base URI of the authentication server.
For example, if our authentication server base URL was https://dev-MyDotnetApplication.us.auth0.com then you could assume that the Authorization Endpoint would be "https://dev-MyDotnetApplication.us.auth0.com/authorize and the Token Endpoint would be https://dev-MyDotnetApplication.us.auth0.com/oauth/token. But this can be error prone and it is a pain to have to keep track of all of the various endpoint URLs individually. Instead, the OpenID Connect protocol Section 4 provides a well-known URL https://{Base URL}/.well-known/openid-configuration to the authorization server base URL like https://dev-MyDotnetApplication.us.auth0.com/.well-known/openid-configuration. This endpoint returns a JSON object that contains properties for all of the various endpoints and information we will need:
{
    "issuer": "https://dev-MyDotnetApplication.us.auth0.com/",
    "authorization_endpoint": "https://dev-MyDotnetApplication.us.auth0.com/authorize",
    "token_endpoint": "https://dev-MyDotnetApplication.us.auth0.com/oauth/token",
    "jwks_uri": "https://dev-MyDotnetApplication.us.auth0.com/.well-known/jwks.json",
    ...
}
We just need to send an HTTP GET request to the configuration endpoint and then use the URLs in the JSON authorization_endpoint and token_endpoint properties. The JSON jwks_uri property contains a URL used to retrieve the JSON Web Keys that contains the Public Keys needed to verify the tokens that we receive from the token endpoint.
Microsoft has already provided classes that maintain and cache this configuration data for us. The OpenIdConnectConfigurationRetriever and OpenIdConnectConfiguration classes retrieve and store the OpenID Connect configuration data for us. We can then just use the AuthorizationEndpoint, TokenEndpoint and SigningKeys properties of the retrieved OpenIdConnectConfiguration object when we need those values. This makes RetrieveOpenIdConnectConfigurationAsync really trivial:
    private async Task<OpenIdConnectConfiguration> RetrieveOpenIdConnectConfigurationAsync(CancellationToken cancellationToken)
    {
        var uri = _authSettings.Authority.TrimEnd('/') + "/.well-known/openid-configuration";
        _logger.LogInformation("Retrieving configuration from {endpoint}...", uri);
        var configurationManager = new ConfigurationManager<OpenIdConnectConfiguration>(
            uri,
            new OpenIdConnectConfigurationRetriever(),
            new HttpDocumentRetriever());
        return await configurationManager.GetConfigurationAsync(cancellationToken);
    }
RequestAuthorizationCodeAsync Function
This function has a bit more code but isn’t really doing anything complicated. At a high level it does the following:
- Starts an ICallbackListener instance and gets the Redirect URI.
- Generates an authorization URL including the Redirect URI.
- Opens the authorization URL in the default system browser.
- Waits for the browser to redirect to the Redirect URI via the listener.
- Validates the response and returns the authorization token.
    private async Task<AuthorizationCallbackResponse> RequestAuthorizationCodeAsync(string codeVerifier, OpenIdConnectConfiguration openIdConfiguration, CancellationToken stoppingToken)
    {
        _logger.LogInformation("Requesting authorization code from {endpoint}...", openIdConfiguration.AuthorizationEndpoint);

        // Generate values used to protect and verify the request
        var requestState = Base64UrlEncoder.Encode(RandomNumberGenerator.GetBytes(16));
        var codeChallenge = Base64UrlEncoder.Encode(SHA256.HashData(Encoding.ASCII.GetBytes(codeVerifier)));

        // Start the listener and generate the Redirect URI
        ICallbackListener listener = CallbackListenerFactory.GetCallbackListener();
        listener.Listen(_authSettings, out var redirectUri);

        // Build the authorization request URL
        var parameters = new Dictionary<string, string>
        {
            { "response_type", "code" },
            { "client_id", _authSettings.ClientId },
            { "redirect_uri", redirectUri },
            { "scope", "openid email profile" },
            { "state", requestState },
            { "code_challenge", codeChallenge },
            { "code_challenge_method", "S256" },
        };

        if (!string.IsNullOrEmpty(_authSettings.Audience))
        {
            parameters.Add("audience", _authSettings.Audience);
        }

        string url = BuildUrl(openIdConfiguration.AuthorizationEndpoint, parameters);

        // Open System Browser and wait for the redirect response URI
        _logger.LogInformation("Opening default browser...");
        _logger.LogDebug("Request URL: {request}", url);

        OpenSystemBrowser(url);

        _logger.LogInformation("Waiting for response from browser...");
        var responseUri = await listener.WaitForResponseAsync(stoppingToken);

        _logger.LogDebug("Response URL: {url}", responseUri);

        string? error = null;
        string? errorDescription = null;

        // Verify the redirect response URI exactly matches the Redirect URI sent in the authorization request
        if (!responseUri!.ToString().StartsWith(redirectUri))
        {
            error = "Invalid Response";
            errorDescription = $"The response does not match the redirect URI: {redirectUri}";
        }

        // Check response for errors
        var queryString = HttpUtility.ParseQueryString(responseUri?.Query ?? string.Empty);
        error ??= queryString["error"];
        if (error != null)
        {
            errorDescription ??= queryString["error_description"] ?? "Unknown Error";
            _logger.LogError("Authorization request failed: {error} - {description}", error, errorDescription);
            throw new Exception($"Authorization request failed: {error} - {errorDescription}");
        }

        var callbackResponse = new AuthorizationCallbackResponse
        {
            AuthorizationCode = queryString["code"] ?? string.Empty,
            RedirectUrl = redirectUri,
            State = queryString["state"] ?? string.Empty
        };

        // Verify the state matches what was sent in the authorization request
        if ((requestState != callbackResponse.State) || string.IsNullOrEmpty(callbackResponse.AuthorizationCode))
        {
            throw new Exception("Invalid authorization state");
        }
        return callbackResponse;
    }
When the system browser is done authenticating and authorizing or request, it will redirect the user to the Redirect URI we provided with the response as query string parameters.
The redirect response will be handled by the ICallbackListener interface implementation obtained by the CallbackListenerFactory that will be discussed later but for right now all that we need to know is that they handle listening for and retrieving the redirect response URI from the system browser.
One important thing to point out here is that code_challenge and code_challenge_method values are included in the authorization request.
This implements the PKCE workflow covered in the RFC 7636 Proof Key for Code Exchange by OAuth Public Clients Section 4.1 and is used to prevent malicious interception and tampering of the data.
This value is generated from the Code Verifier mentioned earlier that was created by generating 32 bytes of secure random data and then Base64 URL encoding the bytes.
The Code Challenge is then prepared using the S256 Code Challenge Method by taking the Code Verifier and applying the SHA-256 hashing algorithm and then Base64 URL encoding the result again.
An example generated URL is provided below:
https://dev-MyDotnetApplication.us.auth0.com:443/authorize?response_type=code&client_id=OiCPeU0i214x6nJUq4YG4ECUlPOSUAlt&redirect_uri=http%3A%2F%2F127.0.0.1%3A49152%2Fcallback&scope=openid%20email%20profile&state=lZ01ygDKM6JhNC0iwcNLsA&code_challenge=n3KyPPCdoUaY44czXEq_Mb_-k6UqqjscXAV__Z5WjMA&code_challenge_method=S256
When the response is received, the application must verify that the URL used matches the Redirect URI and that the state returned in the response matches the state value sent in the authorization request.
An example response is provided below:
http://127.0.0.1:49152/callback?code=kBVS3EnU_F-mjPTsKaHLWcz6muM4sxAuowBaEmHn9239t&state=lZ01ygDKM6JhNC0iwcNLsA
The value returned in the code query string parameter of the URL is then returned as the authorization code.
BuildUrl Function
This is just a quick helper function that takes a base URL and dictionary of string values and generates a URL with properly encoded query string parameters.
    private static string BuildUrl(string baseUrl, Dictionary<string, string> queryParameters)
    {
        var queryBuilder = new StringBuilder();
        foreach (var pair in queryParameters)
        {
            queryBuilder.Append('&');
            queryBuilder.Append(UrlEncoder.Default.Encode(pair.Key));
            queryBuilder.Append('=');
            queryBuilder.Append(UrlEncoder.Default.Encode(pair.Value));
        }
        var uri = new UriBuilder(baseUrl)
        {
            Query = queryBuilder.ToString().Trim('&')
        };
        return uri.ToString();
    }
OpenSystemBrowser Method
This method just opens the specified URL in the default system browser.
All the actual authentication and authorization steps of this workflow happen in the browser. The system browser allows the user to use normal login workflows such as Password Managers and Multi-factor authentication and protects the users actual credentials from being leaked to the requesting application.
    private void OpenSystemBrowser(string url)
    {
        if (RuntimeInformation.IsOSPlatform(OSPlatform.Windows))
        {
            Process.Start(new ProcessStartInfo
            {
                FileName = url,
                UseShellExecute = true,
            });
        }
        else if (RuntimeInformation.IsOSPlatform(OSPlatform.Linux))
        {
            Process.Start("xdg-open", url);
        }
        else if (RuntimeInformation.IsOSPlatform(OSPlatform.OSX))
        {
            Process.Start("open", url);
        }
        else
        {
            throw new NotSupportedException("Cannot open default browser");
        }
    }
RequestTokenAsync Function
The authorization code is not very useful on its own.
It is only used for immediately requesting ID and Access tokens using the Token Endpoint and an HTTP Post with specific Form URL Encoded parameters.
The authorization_code, redirect_uri, and code_verifier are included in the parameters.
The code_verifier is the Code Verifier value that was originally generated.
The Authentication Server will use the same S256 Challenge Method to verify that the Code Verifier given is what created the Code Challenge when the authorization code was requested.
This allows the authentication server to validate that the token request came from the same client who originated the authorization code request and that nothing was tampered with during transmission.
An example of the HTTP POST Form URL Encoded contents is provided below:
grant_type=authorization_code&client_id=OiCPeU0i214x6nJUq4YG4ECUlPOSUAlt&code=kBVS3EnU_F-mjPTsKaHLWcz6muM4sxAuowBaEmHn9239t&redirect_uri=http%3A%2F%2F127.0.0.1%3A49152%2Fcallback&code_verifier=YXlDyKO3oD6Fli-NZSEN4CCHvN5OeBNw0ctAEGFBP1g
    private async Task<OpenIdConnectMessage> RequestTokenAsync(string redirectUri, string authorizationCode, string codeVerifier, OpenIdConnectConfiguration openIdConfiguration, CancellationToken stoppingToken)
    {
        _logger.LogInformation("Requesting access token from {endpoint}...", openIdConfiguration.TokenEndpoint);
        var parameters = new Dictionary<string, string>
        {
            { "grant_type", "authorization_code" },
            { "client_id", _authSettings.ClientId },
            { "code", authorizationCode },
            { "redirect_uri", redirectUri },
            { "code_verifier", codeVerifier }
        };

        if (!string.IsNullOrEmpty(_authSettings.ClientSecret))
        {
            parameters.Add("client_secret", _authSettings.ClientSecret);
        }

        var request = new HttpRequestMessage(HttpMethod.Post, openIdConfiguration.TokenEndpoint)
        {
            Content = new FormUrlEncodedContent(parameters)
        };

        _logger.LogDebug("Request: {request}, Form Parameters: {parameters}", request, parameters);
        var response = _httpClient.Send(request, stoppingToken);
        var json = await response.Content.ReadAsStringAsync(stoppingToken);
        _logger.LogDebug("Response: {json}", json);
        if (!response.IsSuccessStatusCode)
        {
            throw new Exception($"Token request failed: {response.ReasonPhrase}");
        }
        return new OpenIdConnectMessage(json);
    }
If everything checks out, the authentication server will then respond with the tokens which are then deserialized to an OpenIdConnectMessage:
{
    "access_token": "eyJ...MWw",
    "id_token": "eyJ...0kg",
    "scope": "openid profile email",
    "expires_in": 86400,
    "token_type": "Bearer"
}
The ID Token is a JWT token that can be decoded using the JWT.IO Debugger. The token’s payload will contain data similar to the following:
{
  "OiCPeU0i214x6nJUq4YG4ECUlPOSUAlt/roles": [
    "Admin"
  ],
  "nickname": "codepenguin",
  "name": "Code Penguin",
  "picture": "https://s.gravatar.com/avatar/7b6...a13?s=480&r=pg&d=https%3A%2F%2Fcdn.auth0.com%2Favatars%2Fco.png",
  "updated_at": "2023-05-11T01:05:37.918Z",
  "email": "email@example.com",
  "email_verified": true,
  "iss": "https://dev-MyDotnetApplication.us.auth0.com/",
  "aud": "OiCPeU0i214x6nJUq4YG4ECUlPOSUAlt",
  "iat": 1684002348,
  "exp": 1684038348,
  "sub": "auth0|640...e06",
  "sid": "qGH...eVbl"
}
ValidateToken Function
This function takes a JWT token and validates it based on the OpenID Connect Configuration.
The Signing Keys are used to validate that the token was produced by the person holding the corresponding private key.
We set the RoleClaimType so that the user roles will be taken from the specific claims that our Auth0 Action added to the ID Token.
If the token is valid, a `ClaimsPrincipal
    private ClaimsPrincipal ValidateToken(string token, string audience, OpenIdConnectConfiguration openIdConfiguration)
    {
        _logger.LogInformation("Validating token...");
        JwtSecurityTokenHandler.DefaultInboundClaimTypeMap.Clear();
        var tokenHandler = new JwtSecurityTokenHandler();
        tokenHandler.InboundClaimTypeMap.Clear();
        var validationParameters = new TokenValidationParameters
        {
            ClockSkew = TimeSpan.Zero,
            IssuerSigningKeys = openIdConfiguration.SigningKeys,
            NameClaimType = "name",
            RequireExpirationTime = true,
            RequireSignedTokens = true,
            RoleClaimType = _authSettings.RoleClaimType,
            ValidateAudience = true,
            ValidateIssuerSigningKey = true,
            ValidateIssuer = true,
            ValidateLifetime = true,
            ValidAudience = audience,
            ValidIssuer = _authSettings.Authority,
        };
        ClaimsPrincipal claimsPrincipal = tokenHandler.ValidateToken(token, validationParameters, out var validatedToken);
        _logger.LogDebug("Validated token: {token}", validatedToken);
        return claimsPrincipal;
    }
Retrieving the Authorization Code
The Authorization Code workflow for Native apps (RFC 8252 Section 7) outlines three redirect URI options for retrieving this data:
- Private-Use URI Scheme Redirection
- Claimed “https” Scheme URI Redirection
- Loopback Interface Redirection
It doesn’t really matter which way you retrieve the redirect response URI as the actual validation and usage of it is the same and was already covered.
The ICallbackListener instances are responsible for retrieving the redirect response URI from the browser so we can retrieve the authorization code.
For this article we will focus on the last one “Loopback Interface Redirection” for simplicity but the different ICallbackListener implementations could be created to support the other redirect URI options.
ICallbackListener Interface
Edit ICallbackListener.cs with the following contents:
namespace OpenIdConnectConsoleTest;

public interface ICallbackListener
{
    public void Listen(AuthenticationSettings authSettings, out string redirectUri);
    public Task<Uri?> WaitForResponseAsync(CancellationToken cancellationToken);
}
Since we will need the Redirect URI at other steps in the workflow, the Listen method of ICallbackListener will provide the required Redirect URI for the specific redirect URI option implementation so we can send it to the Authorization Endpoint.
The WaitForResponseAsync method will return the redirect response URI that will contain the response values from the authorization request.
CallbackListenerFactory Class
We are only focusing on the “Loopback Interface Redirection” option for this article so the CallbackListenerFactory class just returns a new instance of HttpCallbackListener.
In the future we can swap out the implementation for one of the other redirect URI options.
Edit CallbackListenerFactory.cs with the following contents:
namespace OpenIdConnectConsoleTest;

public static class CallbackListenerFactory
{
    public static ICallbackListener GetCallbackListener()
    {
        return new HttpCallbackListener();
    }
}
HttpCallbackListener Class
This class needs to implement the ICallbackListener interface and have a private field to hold the HttpListener instance that will actually be listening for the redirect URI response.
Edit HttpCallbackListener.cs and update the class with the following contents:
using System.Net;
using System.Net.Sockets;

namespace OpenIdConnectConsoleTest;

public class HttpCallbackListener : ICallbackListener
{
    private HttpListener? _listener;
Listen Method
    public void Listen(AuthenticationSettings authSettings, out string redirectUri)
    {
        int redirectUriPort = GetRedirectUriPort(authSettings.RedirectUriPort);

        _listener = new HttpListener();
        _listener.Prefixes.Add($"http://127.0.0.1:{redirectUriPort}/");
        _listener.Start();

        redirectUri = $"http://127.0.0.1:{redirectUriPort}/callback";
    }
This function just returns a local redirect url based with the specified port and configured path and starts the HttpListener on the specified redirect URI.
For our configuration with RedirectUriPort = 49152 and RedirectUriPath = “callback” the resulting Redirect URI would be:
http://127.0.0.1:49152/callback
GetRedirectUriPort Function
    private static int GetRedirectUriPort(int defaultRedirectUriPort)
    {
        // Use a specific port if configured since Auth0 does not support randomly assigned ports
        if (defaultRedirectUriPort != 0)
        {
            return defaultRedirectUriPort;
        }
        // Retrieve an assigned port from the operating system
        var listener = new TcpListener(IPAddress.Loopback, 0);
        listener.Start();
        var port = ((IPEndPoint)listener.LocalEndpoint).Port;
        listener.Stop();
        return port;
    }
This function is generally used to get a randomly assigned port from the operating system that will be used for the Redirect URI listener. Here we just attempt to open a TCP Listener with port 0 so that the operating system will assign us a port. We then close the listener and then use that port for our HTTP Listener. The technique was borrowed from the Google OAuth for Apps: Sample Console Application for Windows.
RFC 8252 Section 7.3 states:
“The authorization server MUST allow any port to be specified at the time of the request for loopback IP redirect URIs, to accommodate clients that obtain an available ephemeral port from the operating system at the time of the request.”
Unfortunately, Auth0 does not currently support randomly assigned ports so you must specify a port in the Authentication settings and it must match the port used when setting up the Auth0 Callback URLs mentioned previously.
For other authentication servers that support randomly defined ports, leave the RedirectUriPort setting as 0.
WaitForResponseAsync
    public async Task<Uri?> WaitForResponseAsync(CancellationToken cancellationToken)
    {
        var context = await _listener!.GetContextAsync().WaitAsync(TimeSpan.FromMinutes(5), cancellationToken);
        var request = context.Request;
        using (var writer = new StreamWriter(context.Response.OutputStream))
        {
            writer.WriteLine($"<HTML><BODY>Please return to the application.</BODY></HTML>");
            writer.Flush();
        }
        _listener.Stop();
        return request.Url;
    }
This function waits for the browser to redirect to the specified redirect URI where the HttpListener instance is listening.
There is a 5 minute timeout here just so we are not waiting indefinitely.
An HTML response is sent back to the browser so the user knows they should return to the application.
Finally the URL of the request is returned as our redirect response URI.
Testing out the console application
Execute the console application by calling dotnet run.
The system default browser should pop up with a prompt similar to the following:
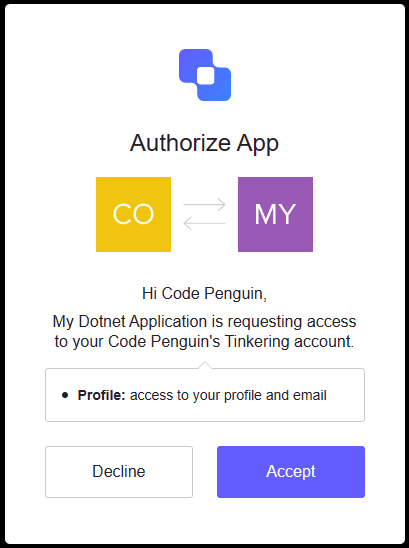
The browser will then change to show the message “Authorization code received” if everything was successful. Returning to the console application will then show information about the authorized user similar to the following:
info: OpenIdConnectConsoleTest.Worker[0]
      Authenticating with https://dev-MyDotnetApplication.us.auth0.com/...
info: OpenIdConnectConsoleTest.Worker[0]
      Retrieving configuration from https://dev-MyDotnetApplication.us.auth0.com:443/.well-known/openid-configuration...
info: OpenIdConnectConsoleTest.Worker[0]
      Requesting authorization code from https://dev-MyDotnetApplication.us.auth0.com/authorize...
info: OpenIdConnectConsoleTest.Worker[0]
      Starting HTTP Listener...
info: OpenIdConnectConsoleTest.Worker[0]
      Opening default browser...
info: OpenIdConnectConsoleTest.Worker[0]
      Waiting for response from browser...
info: OpenIdConnectConsoleTest.Worker[0]
      Authorization code received
info: OpenIdConnectConsoleTest.Worker[0]
      Requesting access token from https://dev-MyDotnetApplication.us.auth0.com/oauth/token...
info: OpenIdConnectConsoleTest.Worker[0]
      Validating token...
info: OpenIdConnectConsoleTest.Worker[0]
      Authenticated as Id: auth0|640...e06 Name: Code Penguin Email: email@example.com Claims: OiCPeU0i214x6nJUq4YG4ECUlPOSUAlt/roles: Admin, nickname: codepenguin, name: Code Penguin, picture: https://s.gravatar.com/avatar/7b6...a13?s=480&r=pg&d=https%3A%2F%2Fcdn.auth0.com%2Favatars%2Fco.png, updated_at: 2023-05-11T01:05:37.9180000Z, email: email@example.com, email_verified: true, iss: https://dev-MyDotnetApplication.us.auth0.com/, aud: OiCPeU0i214x6nJUq4YG4ECUlPOSUAlt, iat: 1684006121, exp: 1684042121, sub: auth0|640...e06, sid: qGH...Vbl
info: OpenIdConnectConsoleTest.Worker[0]
      Is in role Admin: True
info: OpenIdConnectConsoleTest.Worker[0]
      Is in role Guest: False
info: Microsoft.Hosting.Lifetime[0]
      Application is shutting down...
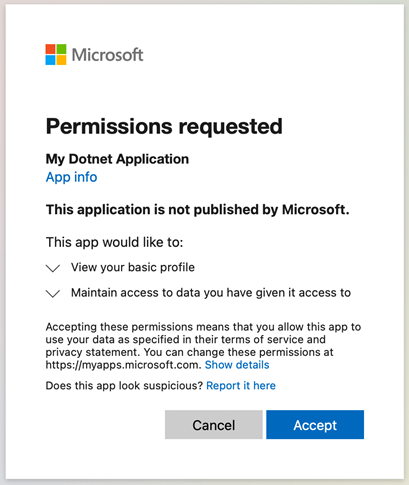
Microsoft Identity Platform
The code and workflows used here should work with any OpenID Connect compliant identity Provider. The Microsoft Identity Platform can be used as well.
Perform the following steps register a new application and setup the appropriate roles:
- Sign up for an Azure account.
- Register a new application via Azure Active Directory -> App Registrations.
- Set the
Redirect URIto:Public client/native (mobile & desktop)andhttp://127.0.0.1/callback - Copy down the
Directory (tenant) IDand{Application (client) IDlisted on the Overview screen. - Create two App roles: Admin, Guest
- Create a test user.
- Use
Enterprise Applications -> Users and groupsto add the Admin role to the test user.
Execute the following to configure the authentication settings for the Microsoft Identity Platform:
dotnet user-secrets clear
dotnet user-secrets set "Authentication:Authority" "https://login.microsoftonline.com/{Directory (tenant) ID}/v2.0"
dotnet user-secrets set "Authentication:ClientId" "{Application (client) ID}"
The RoleClaimType is not included in the configuration because the Microsoft Identity Platform defaults to using the reserved roles claim which is the default value.
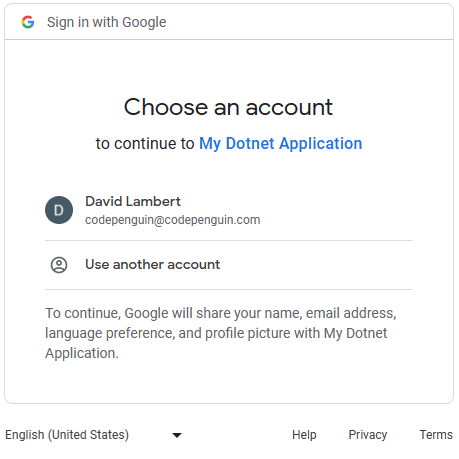
Google’s OAuth 2.0 authentication system
Google’s OAuth 2.0 authentication system can be used as well but does not allow the addition of custom scopes or roles.
Perform the following steps register a new application:
- Create a new project at https://console.developers.google.com/.
- Configure the OAuth Consent Screen.
- Create a new OAuth Client ID (https://console.developers.google.com/apis/credentials and choose Application Type = “Desktop App”
- Copy down the
Client IDandClient Secretlisted on the confirmation screen.
dotnet user-secrets clear
dotnet user-secrets set "Authentication:Authority" "https://accounts.google.com"
dotnet user-secrets set "Authentication:ClientId" "{Client ID}"
dotnet user-secrets set "Authentication:ClientSecret" "{Client Secret}"
An interesting thing to note here is that we are including the Client Secret as well.
Generally, for desktop applications using the Authorization Code workflow, you wouldn’t need to include the Client Secret because it cannot be properly secured in the desktop application.
In this instance, Google is not treating it as secret as pointed out in their documentation for installed applications:
“The process results in a client ID and, in some cases, a client secret, which you embed in the source code of your application. (In this context, the client secret is obviously not treated as a secret.)”
Conclusion
Using the OpenID Connect Authorization Code Flow we can validate external user credentials in a native desktop application. The system default browser is used so that the user’s credentials are not leaked to the application. If the user is already signed in with their authentication provider, the application is immediately logged in without additional interaction if the user has already authorized the application previously. This greatly increases the speed and security of authenticating a user in native desktop applications.
Full source code for this console application: https://github.com/CodePenguin/codepenguin.github.io/tree/main/assets/2023/05/openid-connect-dotnet-desktop-application/OpenIdConnectConsoleTest
If you have questions or comments, feel free to post in the discussion: https://github.com/CodePenguin/codepenguin.github.io/discussions/5
dotnet programming